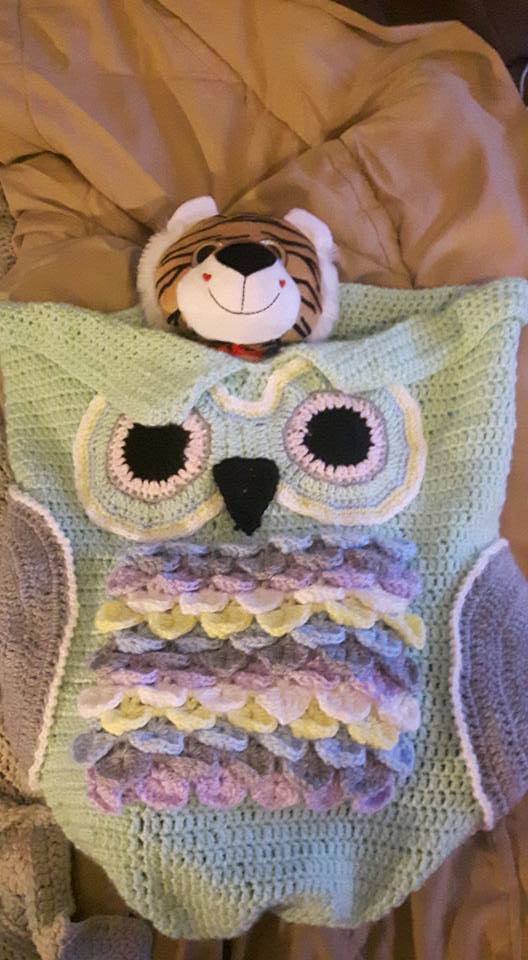
Hoo doesn’t love owls? Especially an owl as cute as this one:
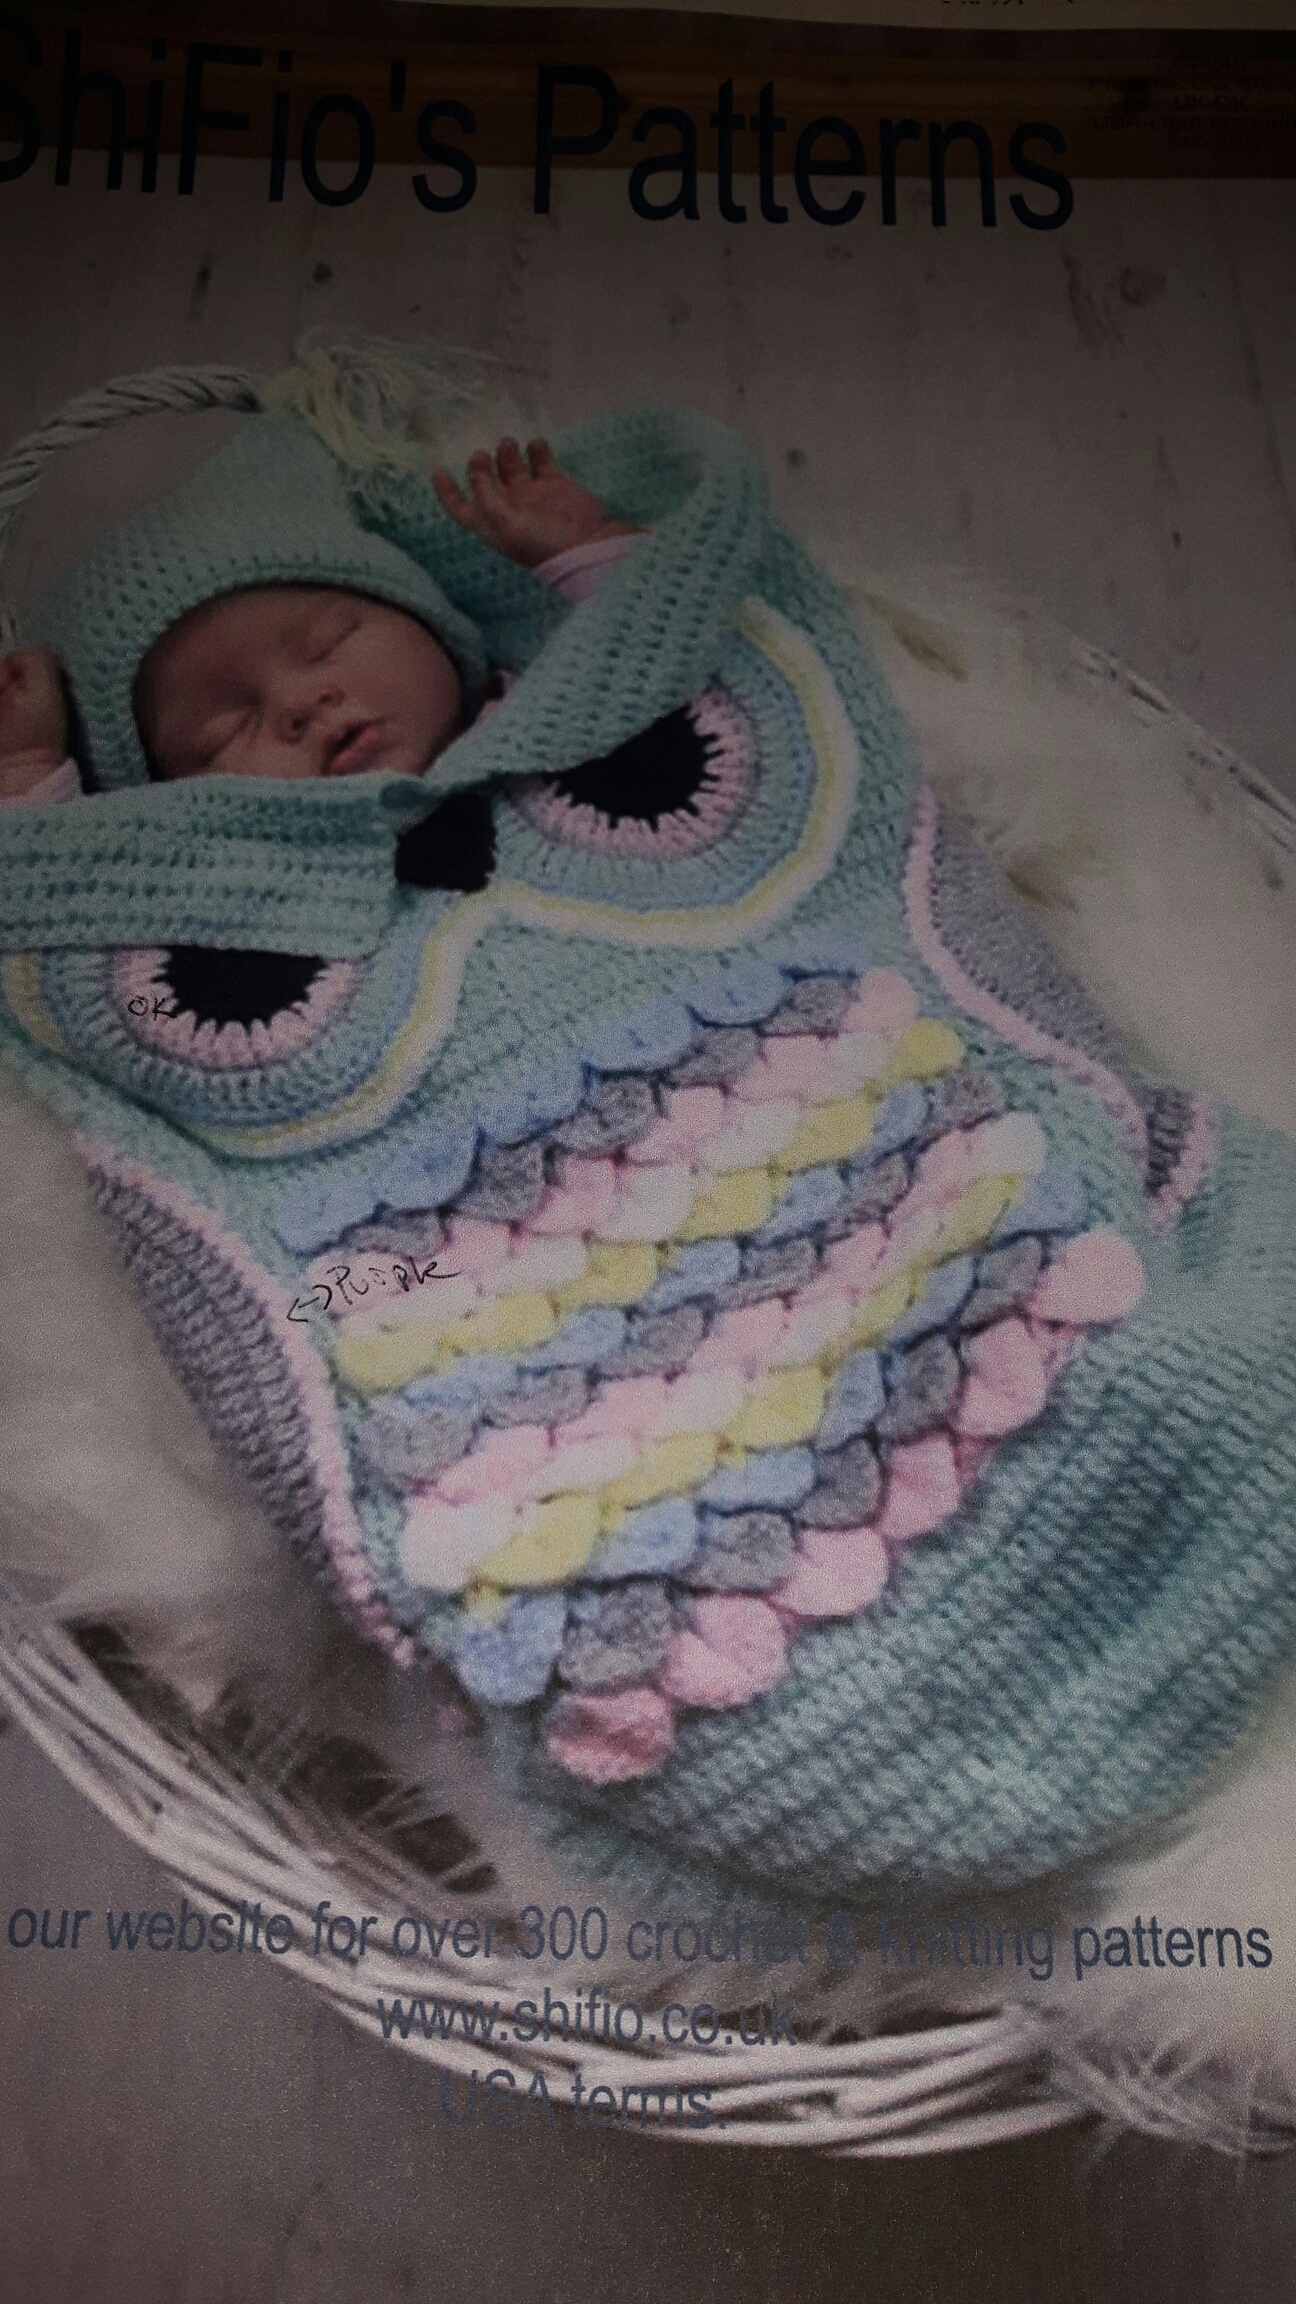
After advertising my services in a few of my local Buy and Sell groups on Facebook, I receive a request to make this adorable Owl Bunting!
After doing some (rather painful) yarn math, we settle on a price and I eagerly place the order online for the materials needed. I wanted to match the image as closely as I could, so I scoured the internet for the proper tones.
The brand I will be using is Bernat Softee Baby Yarn in light worsted (3):
- Mint x2
- Lemon x1
- Flannel x1
- Pink x1
- Lilac x1
- White x1
- Pale Blue x1
- Black x1
The customer has requested that the pink scales on the breast plate be changed to the Lilac and that the eyes remain Pink so I had to pick up an extra colour to account for the modification.
The pattern calls for a 3.5mm E hook, I rarely get to use my E hook so this is a treat.

I don’t know about the rest of you, but when I start a new project the first thing that I do is wind all my yarn into center-pull balls so that they don’t roll around on me. I have cats so this helps minimize the yarn’s alluring nature and amount of cat hair I have to remove from my projects.
I wind all my center-pull yarn by hand so this process can be tedious and result in cramping, but I feel it is worth it to avoid wrestling my materials from furry clutches.

Ugh, yarn barf.
Once the winding is finished, it is time to check my gauge; this project calls for 9dc x4 rows to 2″ (5cm).
None of the stitches required for the Owl Bunting are new to me so right off the bat I feel confident that I can match the pattern without trouble. Although the baby will be a newborn, we decided on making the bunting for the 3-6 month range to ensure growing room. The baby is due sometime in April so I have to get cracking.
***At the time of writing this, the baby shower was moved forward so I actually have until mid-March instead. Yikes!***
Right off the bat, I find an issue with the yarn; I rarely work with baby yarn so I was unaccustomed to the “stringiness” I encountered. I managed to quickly learn how to hold the yarn to stop it from fraying obnoxiously and things started moving along at a much quicker pace.
Once I got into the groove of things, time seemed to fly by; the only way I realized how much time had passed, was my progress through a playlist of YouTube videos.
Poe was under the impression that this Bunting was clearly being made for him and I had to fight a constant battle to keep his furry butt out of the cocoon.
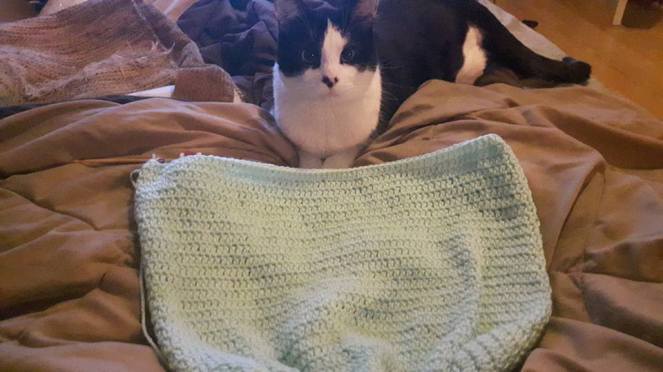
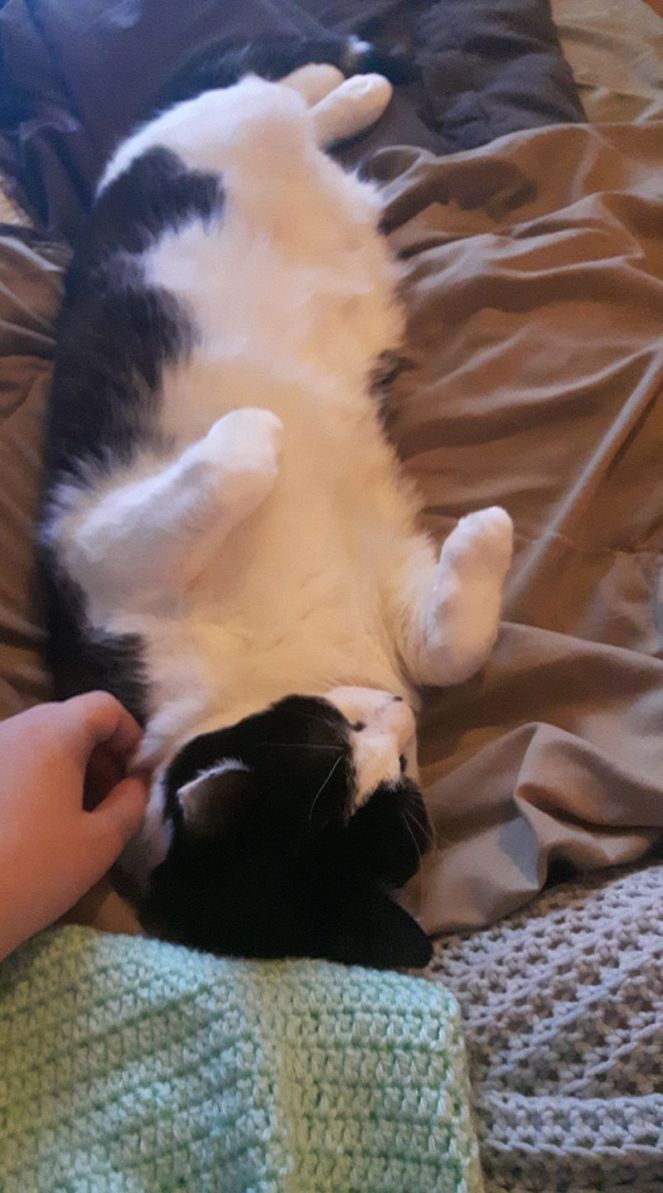
Who else would you be making it for Mom? It is Poe-sized so it must be for Poe.
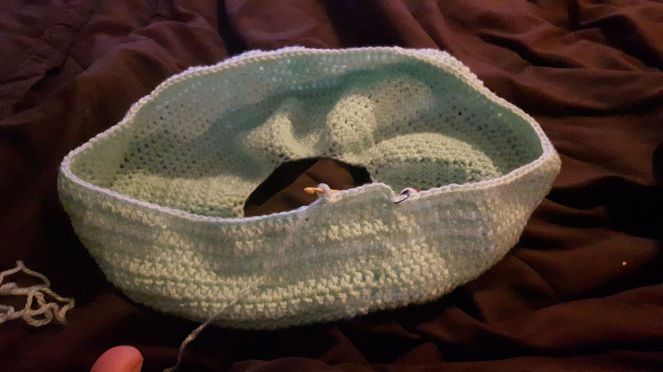
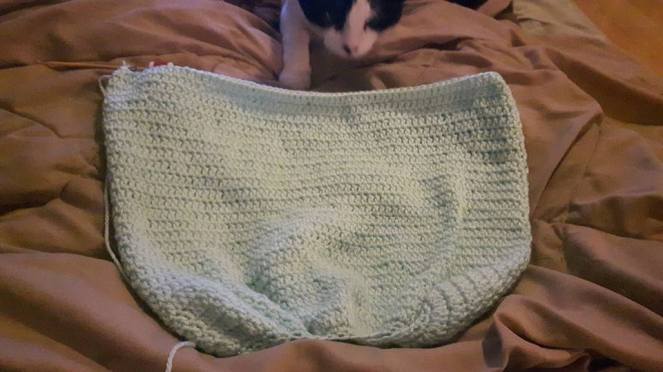
I ended up closing my door, he cried and it broke my heart a smidge but I wiped away my tears of sympathy and kept working until the main body of the bunting was finished. This took approximately 5 hours.
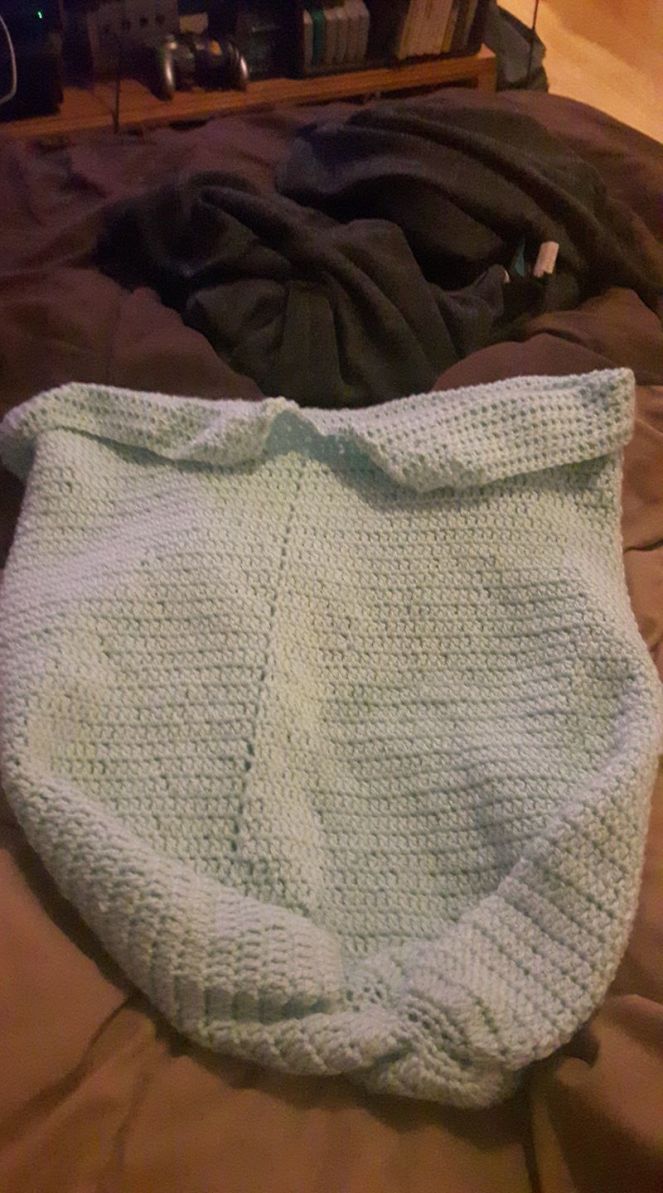
The next step was to make the eyes, beak, wings and breastplate.
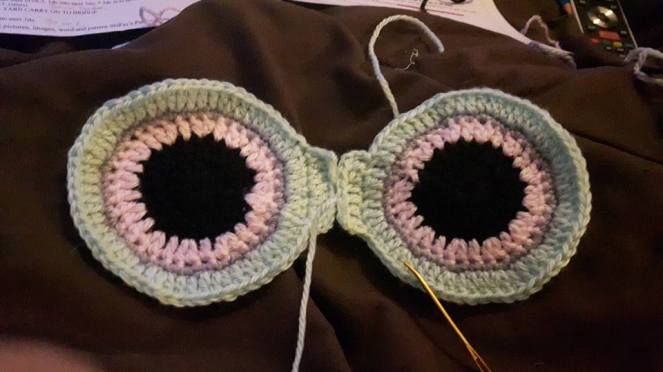
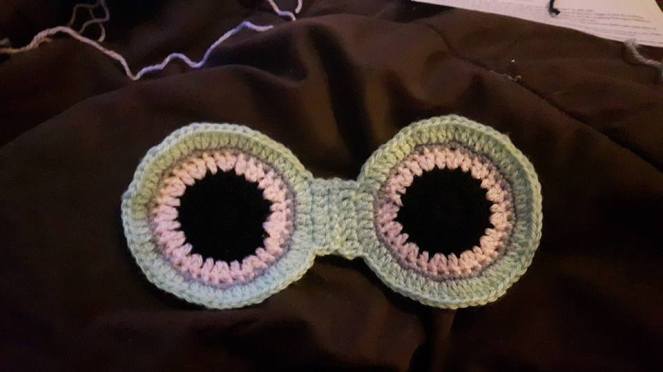
Hooo are you looking at punk?
Instead of chaining and slip stitching to make the starting round as this pattern loves to suggest, I used the more efficient Magic Circle instead and decided that the owl looked less angry when I dropped the beak down to the edge of the border.
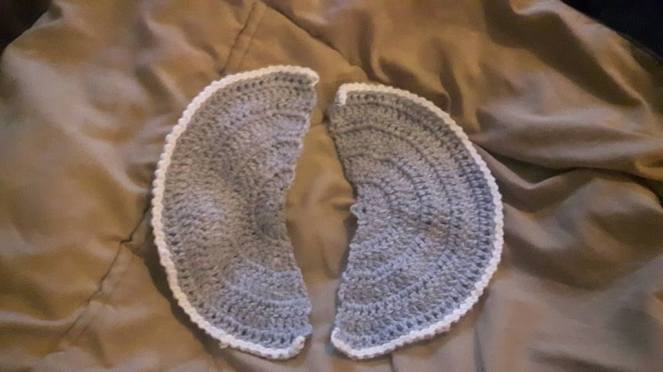
Next, I started on the wings; I absolutely LOVED the edging on this bit. It is achieved by doing one Single Crochet followed by one Slip Stitch in the same stitch to provide that bumpy ruffled look.
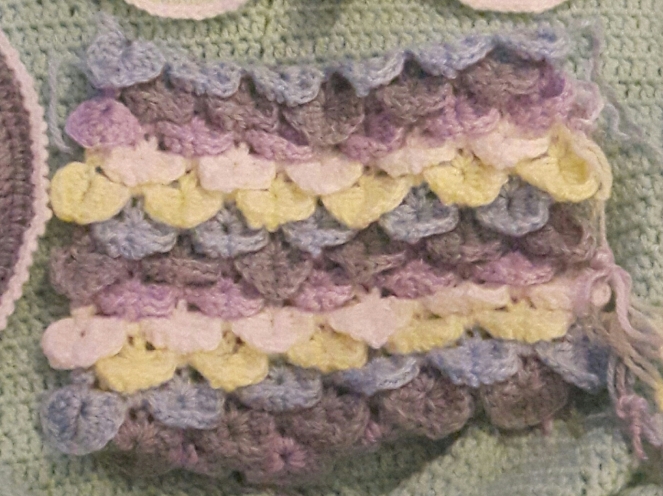
The most interesting part of the bunting to construct was definitely the breastplate. The crocodile stitch is incredibly popular but I admit that I have never utilized it to the extent that most have.
In theory, I understood the pattern, in practice, I zoned out the first time and didn’t space the scales properly.
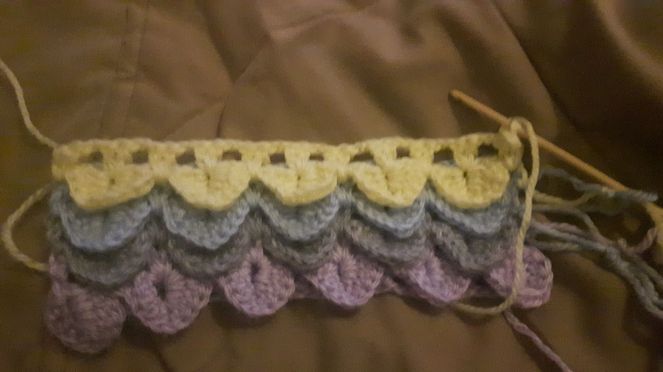
I groaned, frogged it and started over, this time with much better results.
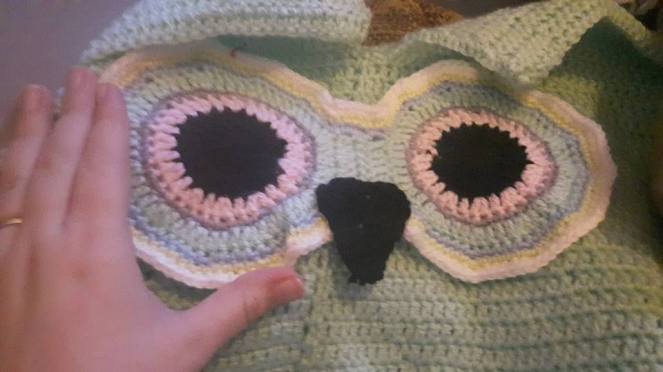
All that was left to do was attach all the bits to the main body of the bunting and then start on the matching hat.
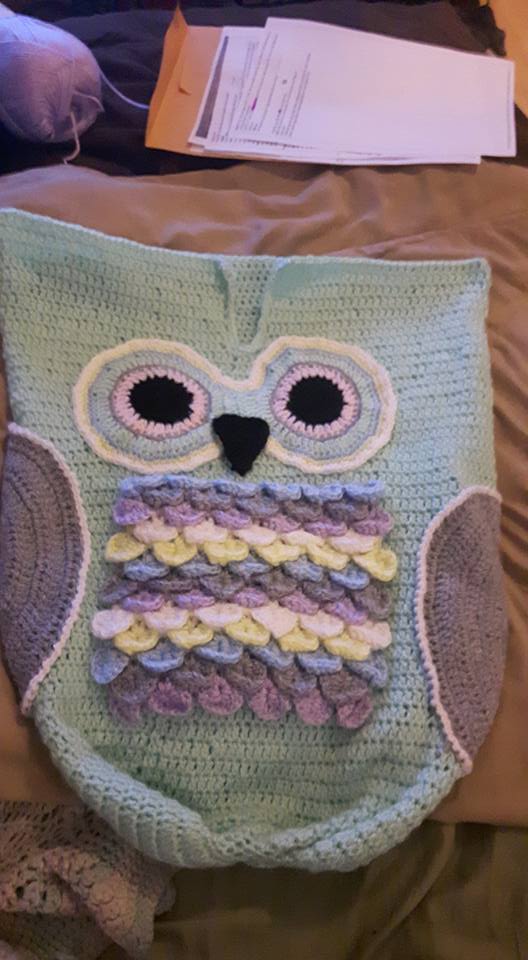
Getting the eyes to go on and not look crooked made the inside of my brain itch a bit but other than that, it was smooth sailing. Here is the end result:
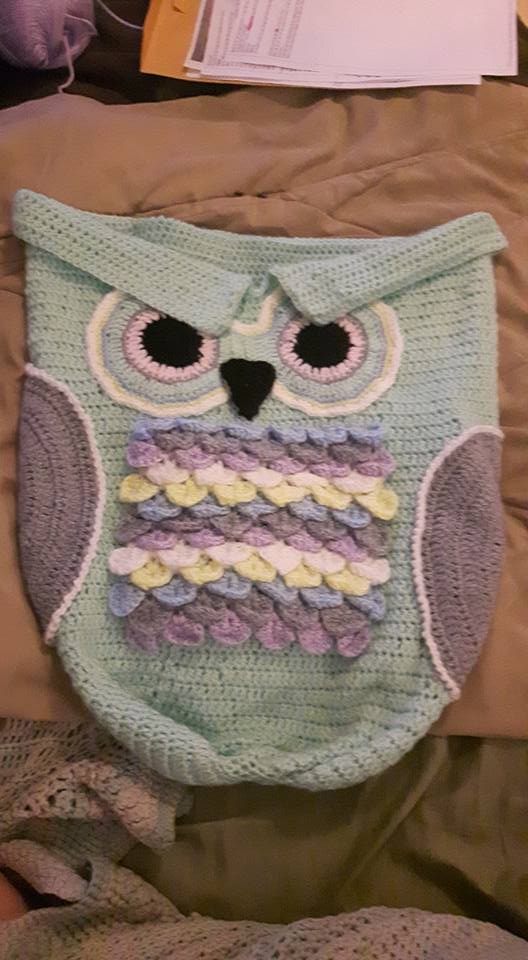
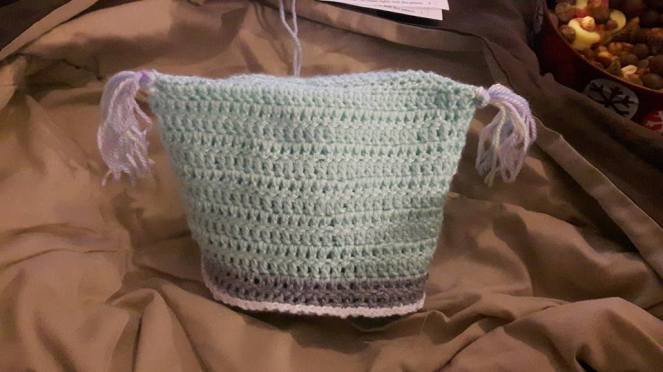
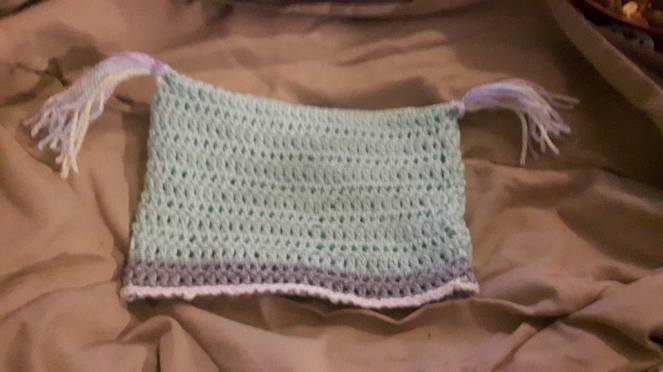
The hat was very quick to whip up, I did run out of the mint yarn 9/10ths of the way through it so I improvised a little. I think it kind of looks like the baby hats that your children in Harvest Moon wear. I also enjoyed mimicking the wing texture on the brim.
And voila! 12 hours and 20 minutes later, it is finished! I sprinted to the finish line and managed to get it done with time to spare before the baby shower.
- Cost of materials: $51.60
- Time invested: 12 hours and 20 minutes
- Cost of labour: $10/hour